Getting Started with LoRaWAN and Zafron
In this tutorial we'll walk through connecting a LoRaWAN device to Zafron using The Things Network.
Requirements
- A LoRaWAN device
- The Things Network commercial or sandbox account
- Zafron account
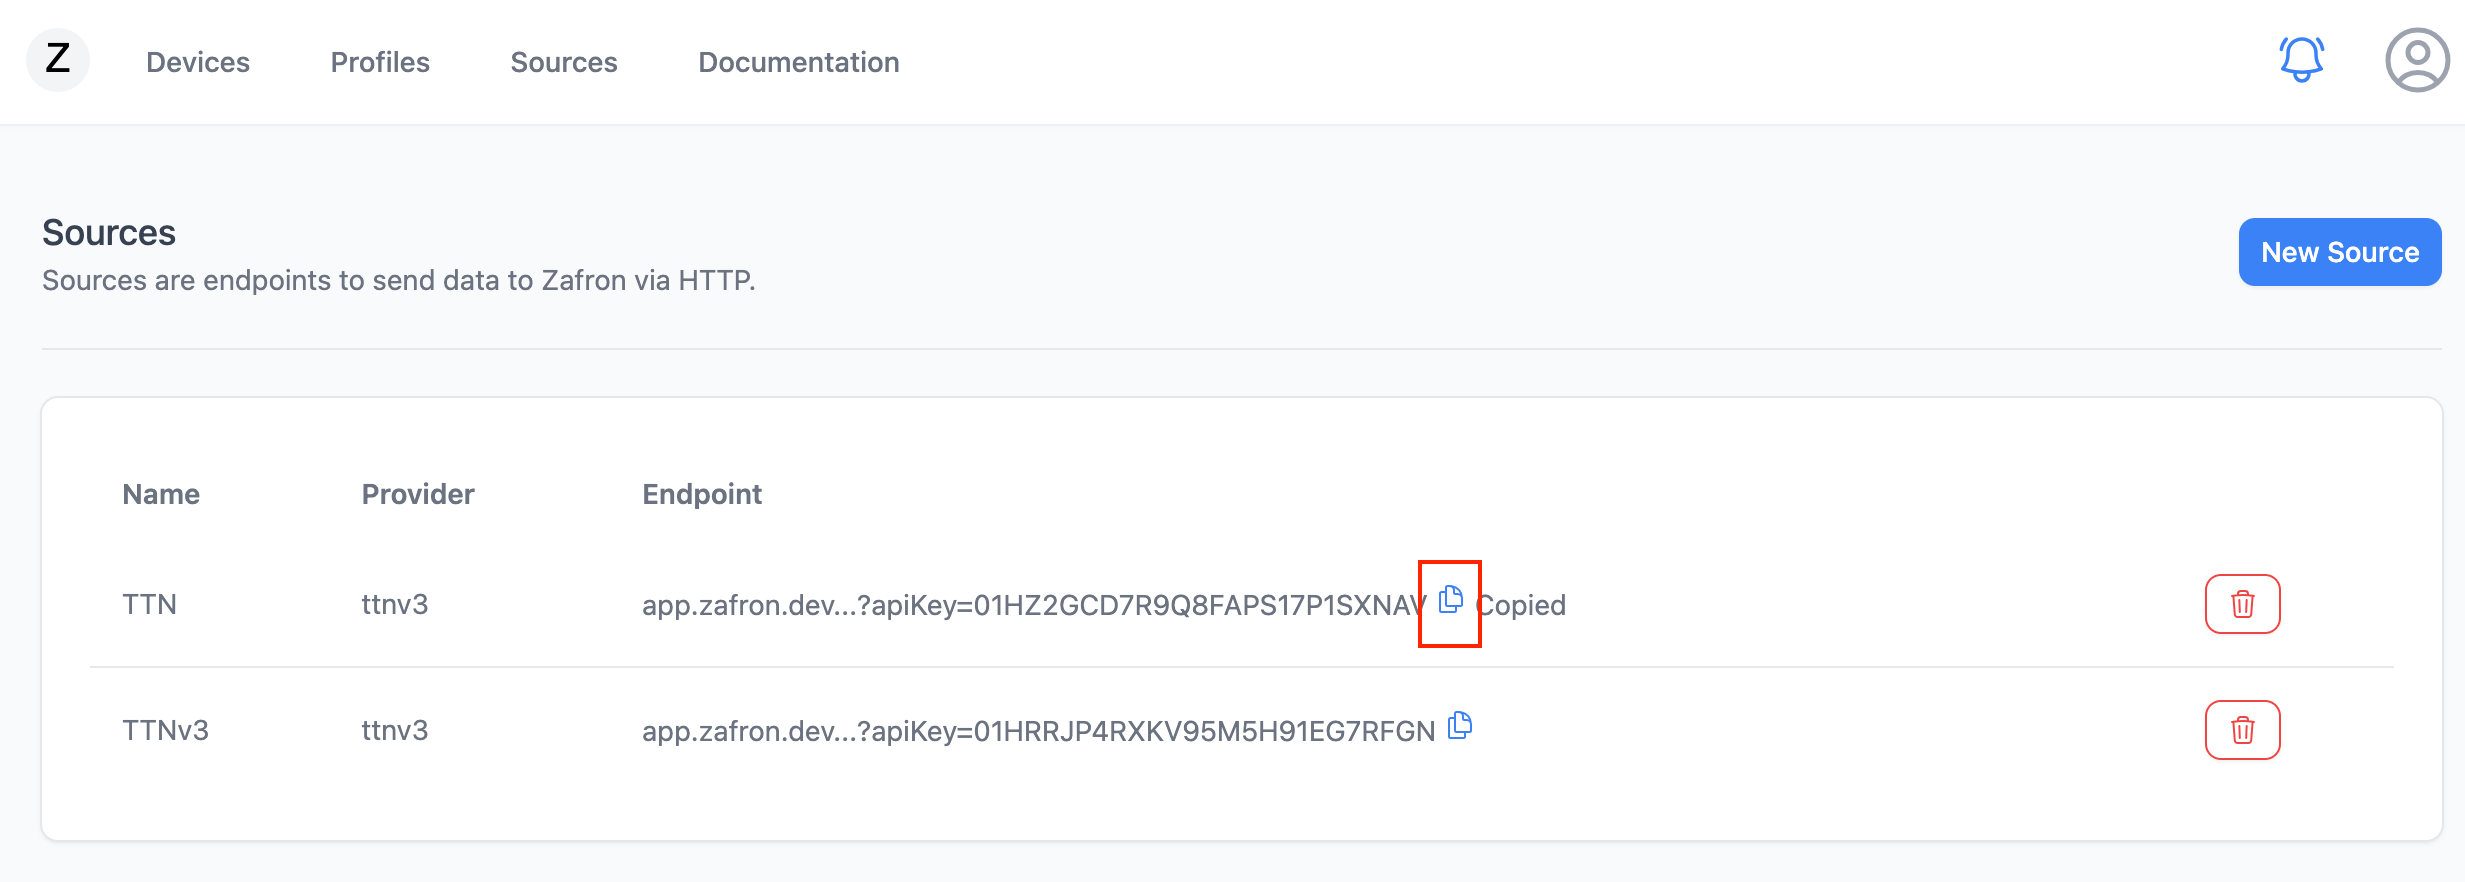
Creating a Source
- Log in to your Zafron account.
- Click on
Sourcesin the top header. - Click on
Create Source. - Input a name and select TTN as the provider.
- Click on
Create Source. - Copy the URL provided.
Create a Webhook in The Things Network
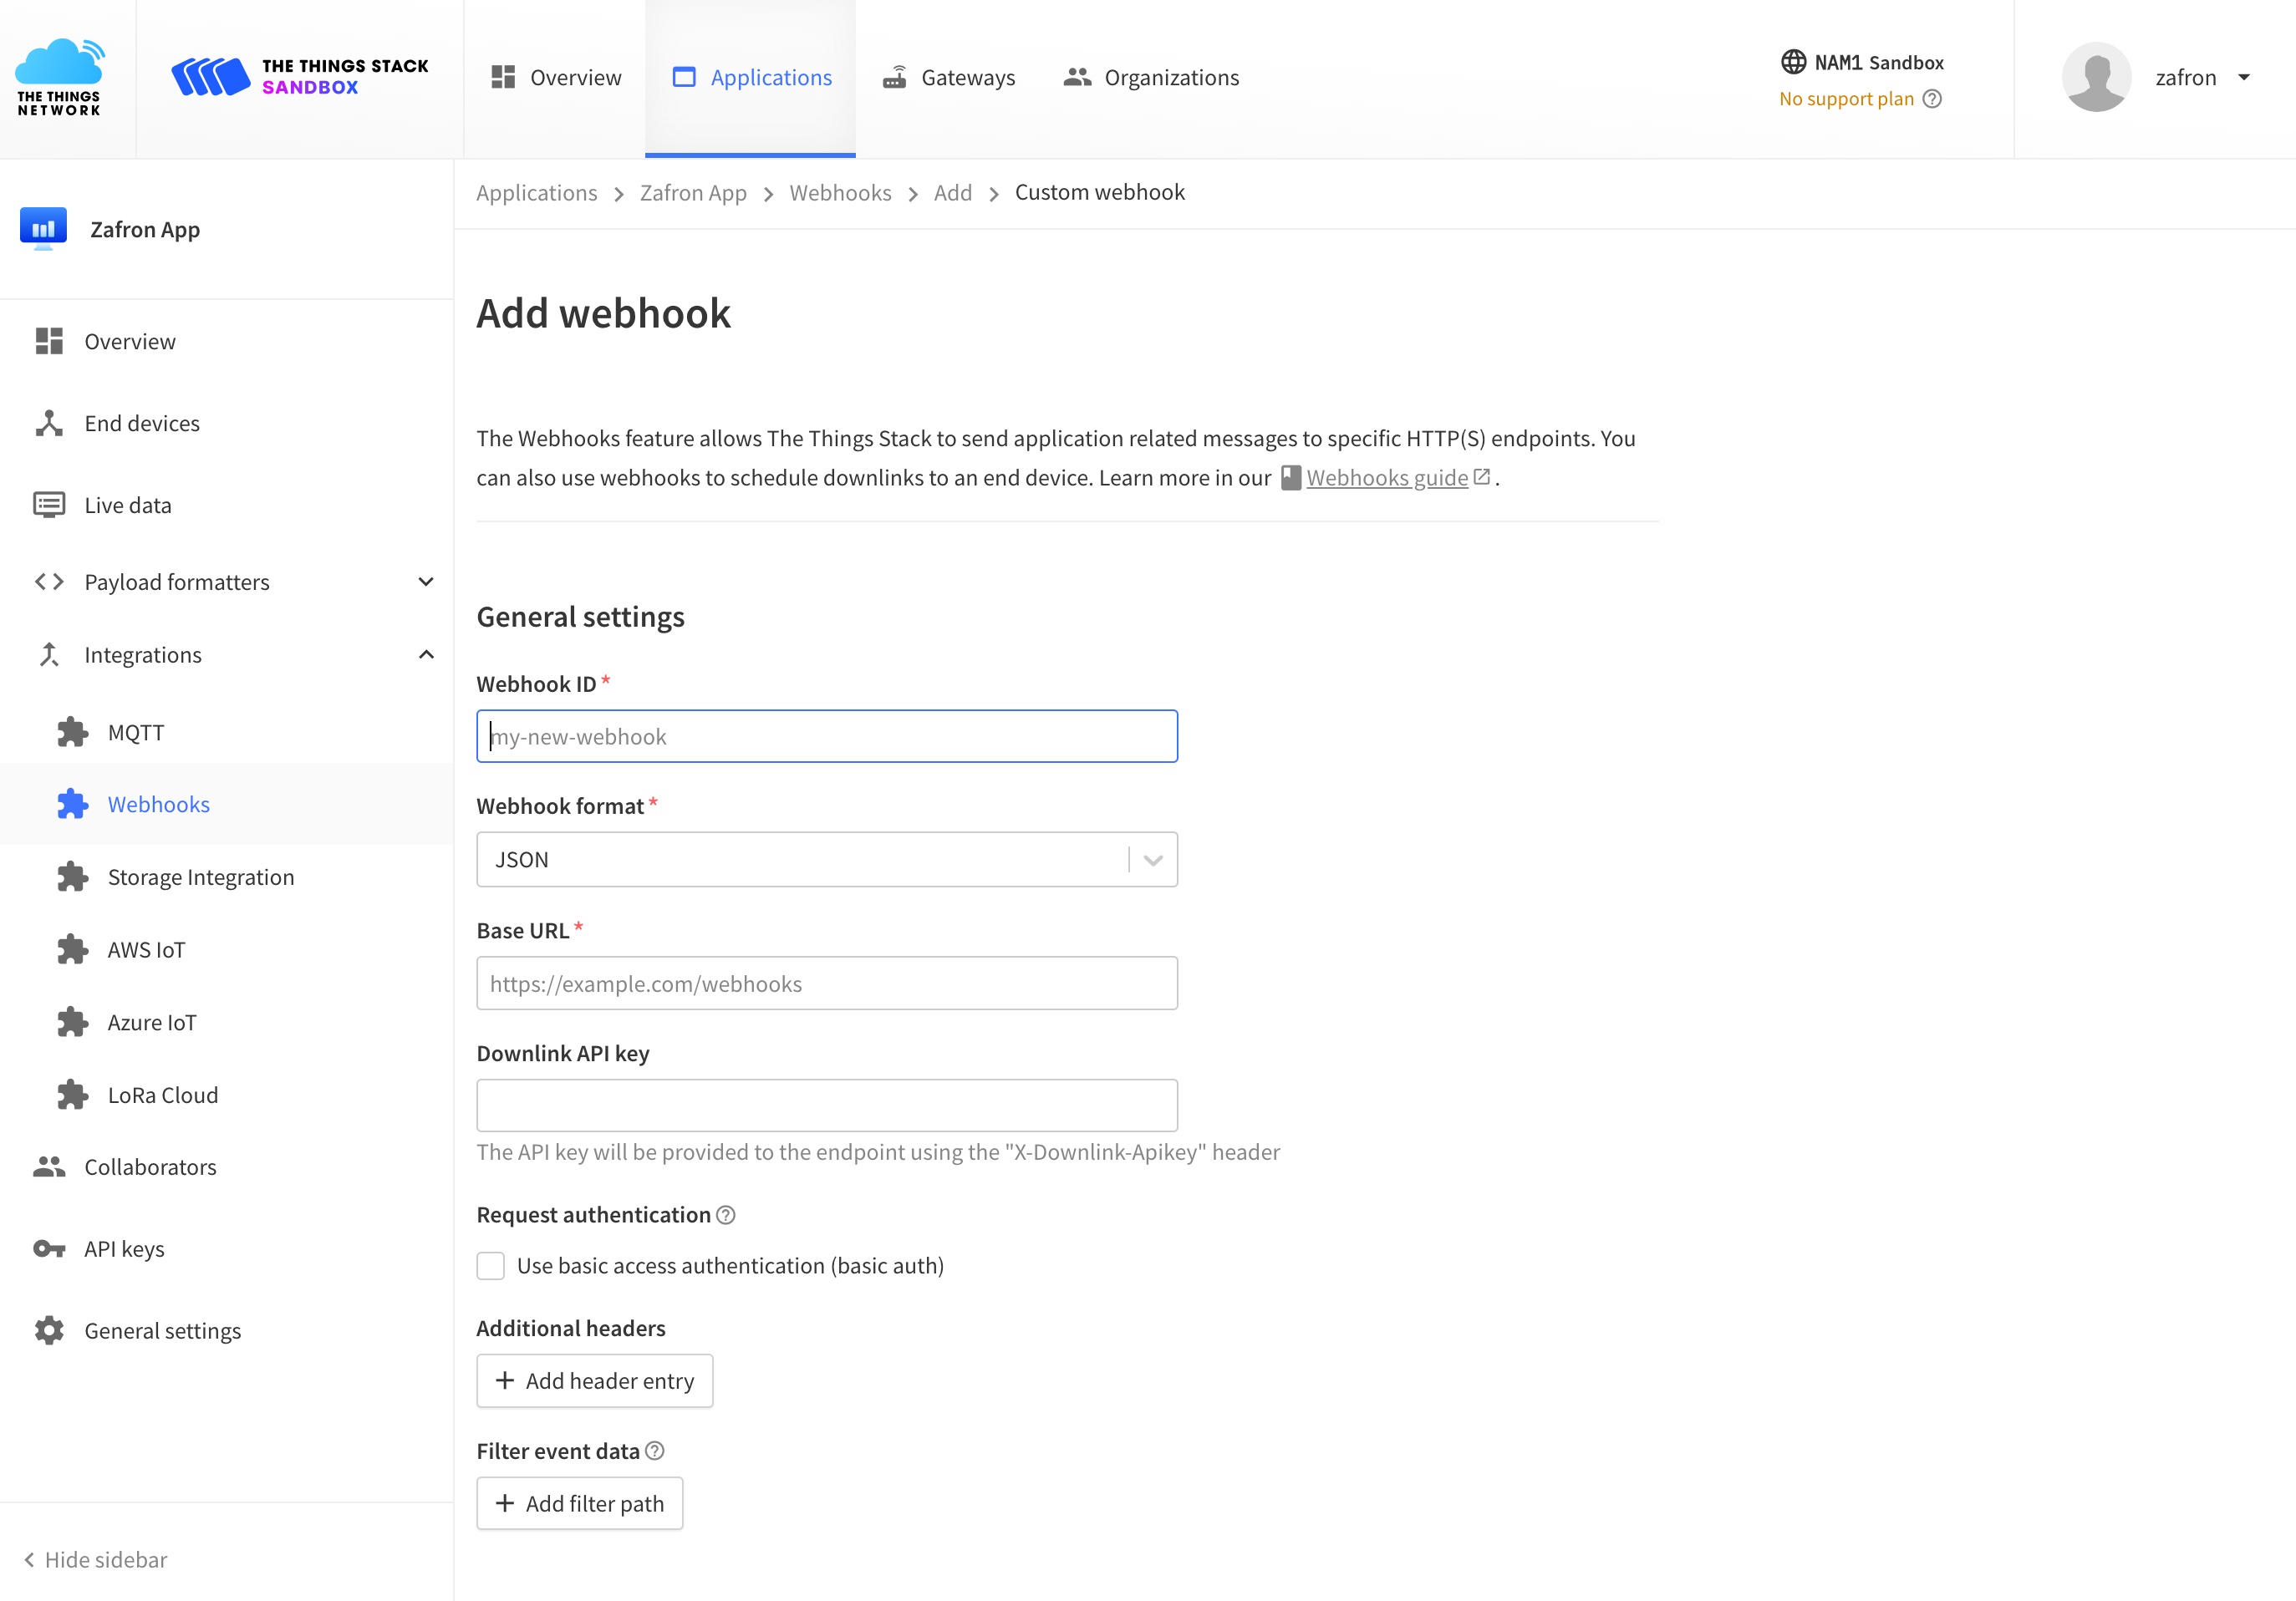
- Log in to your The Things Network account.
- Click on
Applicationsin the top header. - Click on your application.
- Click on
Integrations. - Click on
Add Integration. - Select
Webhook. - Paste the URL from Zafron.
- Select
Uplinkas the message type.
Add the Device
- Click on
Devicesin the top header, thenAdd Device. - Choose LoRaWAN.
- Pick your device model. Models in the supported devices list come with a decoder, so readings arrive named and with units. If your device isn't listed, choose Custom (CayenneLPP); this needs a profile, so create one first (Custom devices).
- Keep the name Zafron picked or type your own, enter the device's DevEUI (printed on the label or box; spaces and colons are fine), and select the source you created.
- Click
Add device.
Watch It Connect
After adding the device, its page shows a setup checklist until the first reading arrives:
- Source is receiving packets: turns done once your network server has sent anything to the source.
- Decoder ready: the catalog decoder, or your profile's decoder for custom devices.
- Registered in your network server: make sure the device exists in your TTN application with the same DevEUI. Use the
Copybutton to copy it. - First uplink: power on the device. It usually reports within a few minutes, and the page updates by itself.
Send Data
- Send data from your LoRaWAN device.
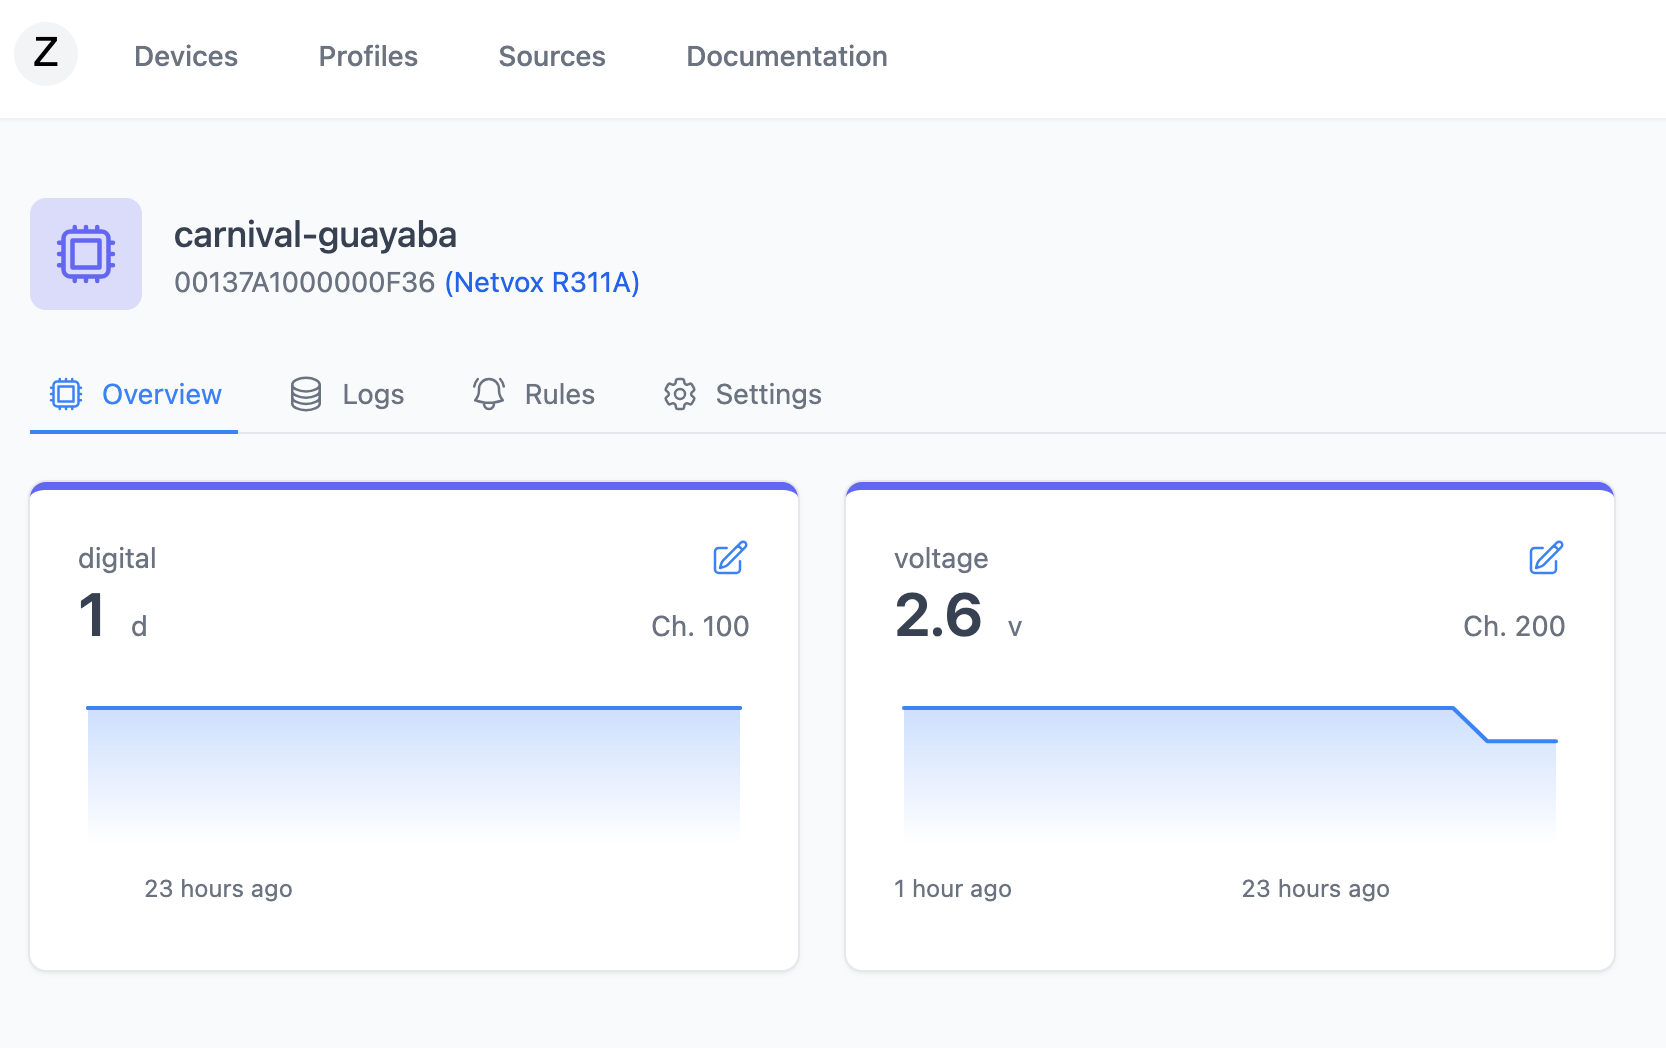
- Check the dashboard in Zafron to see the data.
Custom Devices
Devices that aren't in the supported devices list still work. When adding one, choose Custom (CayenneLPP) and pick a profile. A profile holds the decoder shared by devices of the same kind:
- Click
Profilesin the top header, thenNew Profile. - Input a name, select your source, and click
Create Profile. - Open the profile's Schema tab and choose CayenneLPP (no code needed if your device sends Cayenne Low Power Payload) or Custom (write a decoder in JavaScript).
- Back in
Devices → Add Device → LoRaWAN, choose Custom (CayenneLPP) and pick that profile. Then continue from the name, DevEUI and source step.